Are you having a reception problem with your satellite dish and after check, you discover that it’s a faulty satellite dish LNB. What does LNB mean on satellite dish – LNB is the receiving “device” that is mounted on the satellite dish. It collects radio waves from a satellite dish and converts them to a signal which your decoder can understand.
Low-noise block converter (LNB) receives satellite signal, converts it, and then sends it down to the set-up box or decoder through coaxial cable. How to fix dstv not scanning & decoder not booting up or working Properly
However, it can easily be thrown out of alignment by rain or wind but can be easily adjusted to an adequate position. For a quality signal reception, fix the LNB on the satellite dish to point in a specific direction (south).
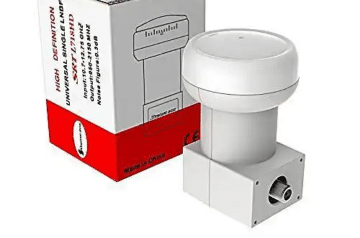
What is twin LNB for satellite dish
A Twin LNB or dual LNB enables the connection of two receivers to the same satellite dish. The connected receivers can tune the entire satellite band as if the two receivers are connected to a different satellite dish. Although, a Monoblock LNB allows you to tune two different satellites close together in the same dish but should not be confused with Twin LNB.
How to fix reception problems from LNB
Step 1
Go to your decoder or satellite box’s setup menu. This may be different based on your box’s make and model, but surely, there will be the main menu button that will lead you to a setup menu. When you find it, enter your transponder screen. You will see how good your dish’s reception is.
Step 2
After checking the transponders 1 and 2 and they are above 70, then your dish may not necessarily need a re-adjustment. Although both should be above 80, 70 is a minimum. If the reception problems persist, check the remaining transponders on your screen. If there’s anyone less than 70, re-adjust the dish to improve your signal reception.
Step 3
To adjust a satellite dish, loosen the bolts holding the dish in place. Loosen the bolts just a bit–just enough to move the dish, but not entirely.
Step 4
Slowly move the dish experimentally from upward to downward and side to side. It should not be more than 1/2 inch at a time. Someone should be watching transponders 1 and 2 from your television screen. After checking the two transponders and its above 70, then check the rest of the transponders and ensure its above 70.
Step 5
Lastly, fix the LNB back to a satellite dish, and tighten the bolts. You should know the Azimuth and elevation for satellite dish pointing.
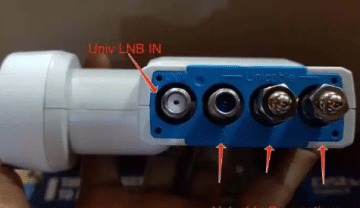
If you are still having connection problems, you might need to change LNB on the satellite dish. Multichoice uses the DStv Smart LNB for all DStv Explora and some XtraView installations when installed in a Single Unit. How to fix dstv not scanning & decoder not booting up or working Properly
Factors To Consider When Choosing Best Lnb For Your Satellite Dish
The LNB used in the receiver terminal must match the digital signal. For better signal reception, here are some factors to consider before choosing an LNB.
- RF leakage,
- rejection of transmitting signals,
- in-band spurious performance,
- out-of-band spurious performance,
- long term aging effects,
- connector types,
- intermodulation performance,
- dynamic range considerations,
- environmental effects,
- reliability concerns and the list goes on,
- vibration effects
Above are factors to check before making a selection of the best LNB to use in your satellite dish installation. Dstv already has its own LNB which is good enough to serve also do dish TV and DirecTV.

Frenzy valentine is a passionate blogger, developer, and entrepreneur. He is the founder and author of myfreshgists.com.
LNB is old making signal breakage so I changed it but still the visuals are the same