A broken or blank laptop screen can totally change the view of your system. A broken laptop screen or blank screen on laptop can make your system to be unusable. You will need to know how to fix laptop screen to complete an assignment or round up a project. “Meanwhile, you can buy a new laptop or laptop screen from Amazon”
Fixing a laptop screen can easily be done following these step by step guide and with a few tools, this can save you money on expensive repairs from a technician. Therefore, all you will do is take the laptop apart and replace the screen correctly. As soon as the new screen is in, you can complete your task and enjoy your laptop once more. how to fix a laptop charger cable: step by step
Part 1 of 3:
Taking Off the Old Laptop Screen
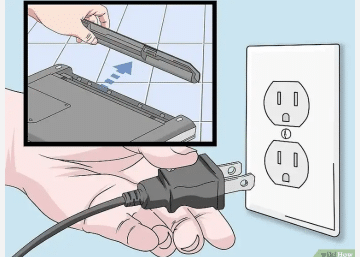
STEP 1. Unplug the laptop and remove the battery. Ensure the system is not connected to power, as you will not enjoy putting hand directly to any live wires or electricity. Bring out the battery so the computer is not on or powered.
Keep the battery safe as it will inserted back.
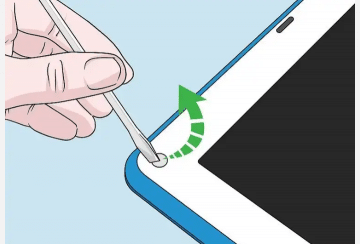
STEP 2. Remove the rubber screw covers on the screen. Some laptops will have small black screw covers made of rubber around the screen to cover the screws. Use the tip of a screwdriver or a safety pin to widen the rubber covers so you can see the bezel screws.
Keep the rubber covers where it is safe so you do not have to search for them.
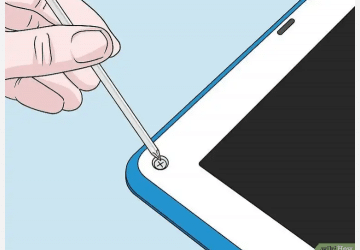
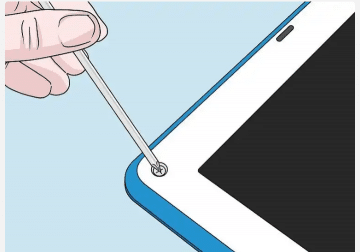
STEP 3. Use a screwdriver to remove the bezel screws. You will find the bezel screw at the front of the screen’s frame. Some laptop models will have the screws on the side of the screen. Utilize the screwdriver to loose out the screws one at a time. There are usually 4-6 bezel screws.
Ensure you safeguard the screws in a safe place.
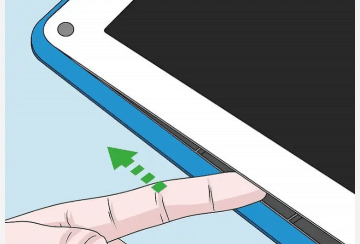
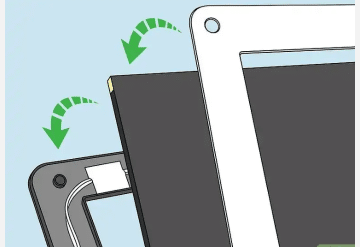
STEP 4. Detach the bezel from the screen. Keep your fingers beneath the center of your laptop screen. Then, carefully slide your fingers in-between the bezel and the screen. Pull the bezel using your fingers. It should be loose. And If it does not, try pulling it slowly in various directions until it becomes loose. Work your fingers around the bezel until it removes from the screen.
If the bezel don’t pop or slide off with a bit of pressure, its likely you may have missed a bezel screw. Inspect the screen visually to confirm you removed all the bezel screws so the bezel can slide off.
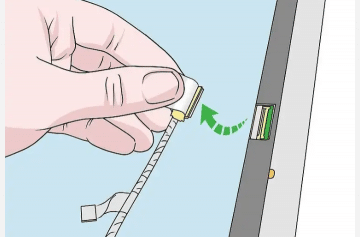
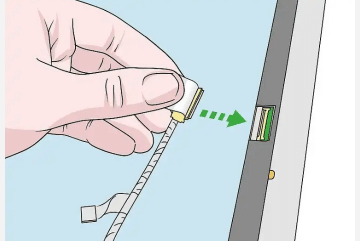
STEP 5. Disconnect the cables connected to the screen. Find the video cable, it is the long ribbon cable taped to the back of the screen. Remove the tape and disconnect the connector from the back of the screen. You might also need to remove the power cable on the back of the screen. How To Fix Windows 10, 8 Laptop Battery Plugged In Not Charging
In some laptop model, you may also have to detach screws along the side of the screen that holds it to the metal frame. Utilize a screwdriver to do this. Keep the screws in a safe place.
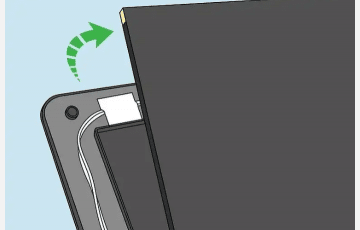
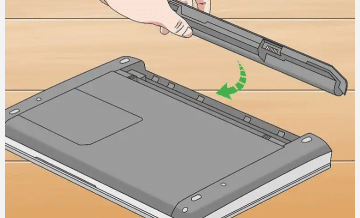
STEP 6. Remove the laptop screen. After the removal of bezel and cables, the screen should be loose in the metal frame. Move the screen forward and gently remove it from the frame.
Rest the screen on a flat surface so you can check it later.
Be mindful of any broken glass falling off or plastic on the screen as you remove it.
Putting On the New Screen
How to fix laptop screen
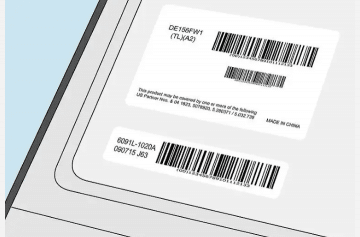
STEP 1. Check the label on the screen for the manufacturer’s label and model number. Here, there should be a label at the corner or back of the screen that contains a bar code as well as the manufacturer’s label and the model number of the laptop. The model number is always a combination of letters and numbers. Utilize the manufacturer’s label and the model number to place order of a replacement screen for your computer.
For instance, if your manufacturer’s label is Dell and the model number is DE156FW1, use this information to find the right replacement screen.
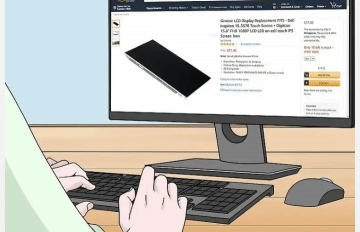
STEP 2. Purchase a replacement screen online or at a computer parts store. You can buy laptop screen online through retailers like eBay and Amazon for a replacement. To be on a safer side ensure the replacement screen comes from the same manufacturer and model number so it will firmly fit in your laptop correctly.
However, you can also purchase a replacement screen from a computer parts store, but it may be more costly than buying it online.
The cost of the screen varies on the brand and type of laptop. Laptop screen price ranges from $100-$300 USD.
STEP 3. Place the screen in the metal frame on the laptop. Meanwhile, after getting your laptop replacement screen, put it back in the metal frame. Ensure it is facing the right side and slides smoothly into the frame. How To Fix Laptop Keyboard Not Working Properly – Do it at home
Bring out the bezel screws and rubber covers so you can fix them on the new screen.
STEP 4. Reconnect the cables to the new screen. Use your fingers and gently fix the video cable and the power cable on the back of the new laptop screen. Confirm that your cables are well secured and fit properly onto the new screen.
If your replacement screen is from your PC manufacturer and has the same model number, the cables should fit properly.
Confirming the Laptop Screen is Fixed
STEP 1. Put the battery back into the laptop and plug it in. Before you fix back the screen, confirm it works. Plug the laptop to a power outlet so you can test it.
STEP 2. Check that the screen works properly. Observe your laptop screen as you navigate through your menus. See that there are no blurry lines, cracks, or distorted images along the edges of your screen. The screen should work properly like new. STEP BY STEP HOW TO FIX LAPTOP BATTERY – weak & DEAD CELLS
STEP 4. Put in the bezel and the bezel screws to secure the new screen. Connect the bezel by snapping it over the screen. Then, put the bezel screws in, fix them back with a screwdriver so the screen is held in place.
Finish by putting on the rubber covers on the bezel screws so the screws are well secured and protected.
In conclusion, after following these step by step method to fix laptop screen,let us know your thought using the comment box. Join our WhatsApp group to be updated


1 thought on “Simple Steps To Fix Laptop Screen With Pictures”