Last updated: July 2026
Replacing an HP laptop’s hard drive is one of the cheapest upgrades you can make, and in 2026 it almost always means swapping a slow drive for a fast SSD. Done right, your laptop keeps every file and program exactly as it was, just dramatically faster. Done wrong, you reinstall Windows from scratch.
This guide covers the whole job: working out which drive your laptop takes, copying your data across so you lose nothing, and the physical swap itself.
On This Page
- Which drive does your HP laptop take?
- The step that saves your data: cloning
- What you need
- How to clone your drive
- Doing the physical swap
- After the swap: first boot
- Common questions
Which Drive Does Your HP Laptop Take?
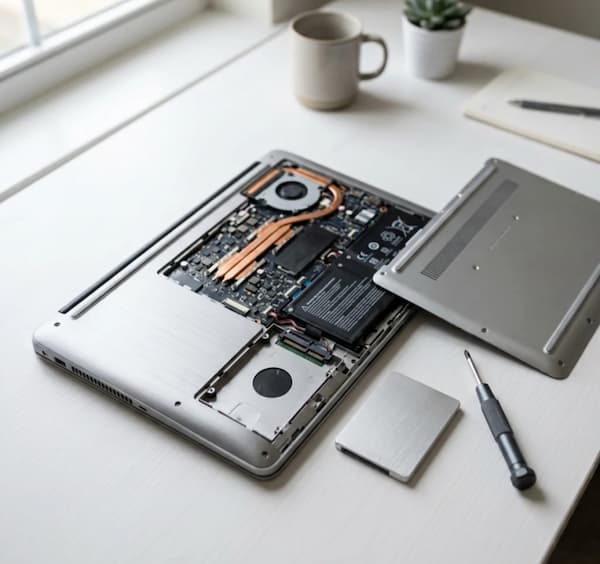
Before buying anything, find out what your laptop has. Modern HP laptops use one of three drive types, and buying the wrong one wastes money. Check your exact model on HP’s support site, or open the access panel and look.
The three types are a 2.5-inch SATA drive, the traditional flat rectangle; an M.2 SATA stick, a small gumstick that slots into the motherboard; and an M.2 NVMe stick, which looks identical to M.2 SATA but is far faster. If you are weighing SATA vs NVMe, NVMe wins clearly on speed, so choose it whenever your model’s slot supports it. Many HP laptops have both a 2.5-inch bay and an M.2 slot, which means you can add an SSD without even removing the old drive.
The simplest way to be certain is to search your exact model number, which is printed on the base of the laptop, plus the word “specifications” on HP’s site. The maintenance and service guide for your model lists the drive type and shows where it sits.
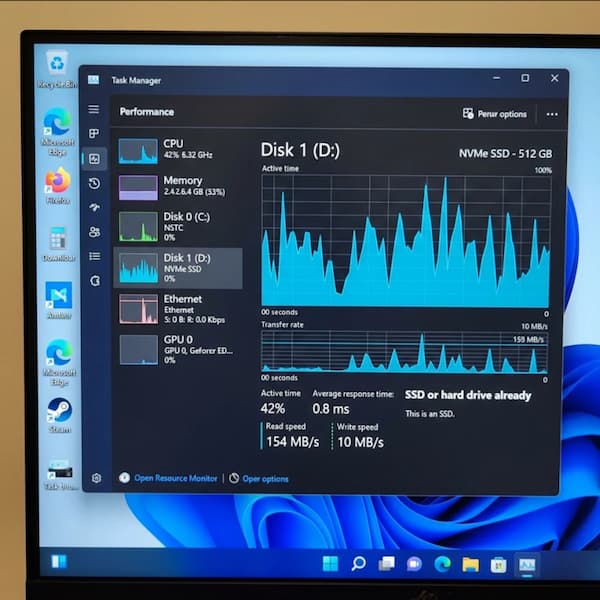
Does my laptop have an SSD or a hard drive already?
Open Task Manager, go to the Performance tab, and click Disk. It tells you whether the drive is an HDD or SSD. If it already says SSD and the laptop is slow, the drive is not your problem, and replacing it will not help.
The Step That Saves Your Data: Cloning
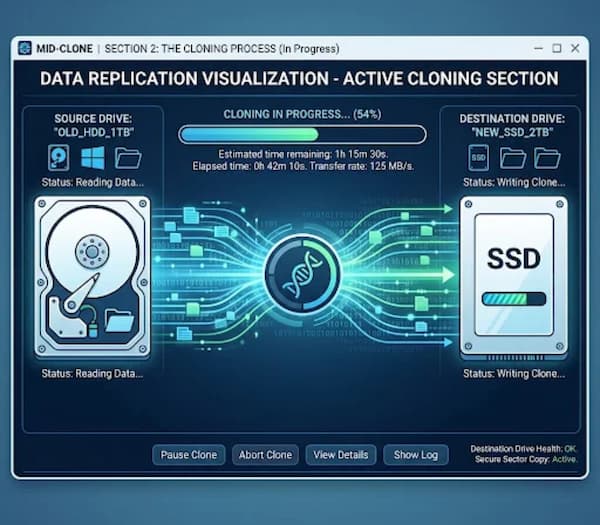
The most important decision is whether to clone or start fresh. Cloning copies everything from your old drive to the new one, so Windows, your programs, and your files all appear exactly as before. Without it, you reinstall Windows and lose everything not backed up.
This is the step the old way of doing things skipped, and it is the one that matters most. Cloning a drive without reinstalling Windows turns a daunting job into a transfer you barely notice.
There is one case where a fresh install beats cloning. If your laptop has been riddled with viruses or Windows has been misbehaving for months, a clean install on the new drive gives you a fresh start rather than copying the problems across. For everyone else, clone.
What You Need
Gather these before you start, so you are not stopping halfway.
- The correct SSD for your laptop, matched to the type you confirmed above
- A small Phillips screwdriver, ideally a laptop repair kit
- A SATA-to-USB or M.2-to-USB adapter or enclosure, to connect the new drive while cloning
- Free cloning software, several reputable options exist at no cost
- A plastic pry tool, or an old bank card, for opening the case without scratching it
- A small container for screws
A note on the SSD itself. Buy from a known brand rather than the cheapest listing, since a failing budget SSD costs you the whole job twice. Match the capacity to your needs, and remember you can usually clone a larger old drive onto a smaller SSD as long as your actual data fits.
How to Clone Your Drive
Connect the new SSD to your laptop using the USB adapter, open your cloning software, select your current drive as the source and the new SSD as the destination, and start the clone. It runs while you keep using the laptop, and takes anywhere from twenty minutes to a couple of hours.
Do this before you open the laptop, while the old drive is still installed and running normally. The new SSD sits outside the laptop, connected by the adapter, during this stage.
Back up your genuinely irreplaceable files separately first, to a different drive or the cloud. Cloning is reliable, but no backup strategy should have a single point of failure, and photos and documents deserve a second copy.
Let the clone finish completely without interrupting it. When it reports success, you can shut down and move to the physical swap.
Doing the Physical Swap
Now the hands-on part. Take it slowly and keep your screws organised.
Power down safely
Shut the laptop down fully, not to sleep. Unplug the charger. If your laptop has a removable battery, take it out. Many modern HP laptops have a sealed internal battery instead, in which case you cannot remove it from outside, so simply make sure the laptop is fully off and unplugged.
Ground yourself
Static electricity can quietly kill a drive. Before touching any component, discharge yourself by touching a large metal object, such as a radiator or the metal part of a grounded appliance. An anti-static wrist strap is the proper tool if you have one. Avoid working on carpet, and avoid wearing wool.
Open the access panel
On many HP laptops, a panel on the underside gives access to the drive without removing the whole base. Remove the screws, noting that some are captive and stay in the panel. Use the plastic pry tool to release the clips around the edge rather than forcing it, since the clips snap easily.
On slimmer models such as the Envy x360, the entire bottom cover comes off as one piece. Your model’s service guide shows which type you have.
Remove the old drive
For a 2.5-inch drive, it usually sits in a caddy or cage held by a few screws, with a connector at one end. Undo the screws, slide the drive back to disconnect it from the connector, and lift it out. Note exactly how it was oriented.
For an M.2 stick, undo the single small screw holding the far end down. The stick will spring up to a slight angle on its own. Pull it straight out of the slot at that angle.
Install the new SSD
Reverse what you just did. For a 2.5-inch SSD, transfer the caddy or mounting bracket from the old drive, slide the new one firmly into the connector, and secure it. For an M.2 stick, insert it into the slot at the same angle it came out, press it flat, and fasten the single screw. Do not overtighten.
Reassemble
Refit the access panel or base cover, press the clips back until they click, and replace every screw. Refit the battery if you removed one. A screw left out, or a cover not fully clipped, can stop the laptop booting, so account for all of them.
After the Swap: First Boot
Power on and the laptop should boot straight into your familiar desktop, just faster, because you cloned the drive. If it does not boot, the fix is almost always the boot order in the BIOS, not a failed clone.
If you see a “no boot device” message, restart and press the BIOS key during startup, usually F10 on HP laptops. Find the boot order settings and make sure the new SSD is set as the first boot device. Save and exit.
Once Windows loads, confirm the new drive shows its full capacity, and enjoy the speed difference, which on an SSD over an old hard drive is genuinely dramatic. Startup that took two minutes often drops to fifteen seconds.
What to do with the old drive
Do not throw it away. Wiped clean, it makes excellent external storage inside the same USB enclosure you used for cloning, giving you a free backup drive for the files you just protected.
Common Questions
Can I replace my HP laptop hard drive without losing data?
Yes. Clone the old drive to the new SSD before swapping them, using a USB adapter and free cloning software. Everything copies across, so the laptop boots exactly as before with all your files and programs intact.
Do I need to reinstall Windows after replacing the hard drive?
Not if you cloned the drive first. Cloning copies Windows along with everything else. You only reinstall Windows if you chose a fresh start instead of cloning, or if you did not clone before swapping.
How do I know if I need SATA or M.2?
Check your exact model number on HP’s support site, where the specifications and service guide list the drive type and slots. Many HP laptops support both, letting you add an M.2 SSD alongside the existing drive.
Will a new drive actually make an old, slow machine faster?
Yes, and it is usually the single most noticeable upgrade you can make. Swapping a spinning hard drive for an SSD cuts startup from minutes to seconds and makes everything feel instant. It will not help if the machine already has an SSD, or if the real bottleneck is too little memory.
My cloned SSD won’t boot. What’s wrong?
Almost always the boot order. Enter the BIOS by pressing F10 at startup, set the new SSD as the first boot device, then save and exit. The clone itself is rarely the problem.
Worth the Afternoon
An SSD upgrade is the best value improvement you can make to an ageing HP laptop, and cloning means you keep everything exactly as it was. Confirm your drive type first, clone before you open anything, ground yourself, and check the boot order if it does not start on the first try.
If your laptop has other issues alongside a slow drive, our guides cover the common ones: fixing a laptop screen, repairing a laptop charger cable, and fixing a battery that is plugged in but not charging. For the exact drive type, slot layout, and service guide for your specific model, HP’s official HP support site lets you enter your model number and see precisely what your laptop takes.

Frenzy valentine is a passionate blogger, developer, and entrepreneur. He is the founder and author of myfreshgists.com.